Laravel Routing Essentials: A Beginner's Guide
Friday, October 25, 2024
// 6 min read

Table of Contents
Learn about the fundamentals of routing in Laravel in this blog post.
What is a Route?
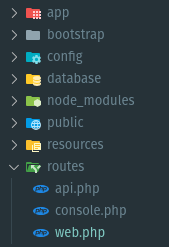
A primary function of the route is to direct requests to the relevant section of your application. Routes are created in the routes folder of a Laravel application.
In particular, the web.php file includes website URLs, while the api.php file contains API URLs. You can map these URLs to specific controllers or closures.
Laravel automatically loads these files based on the withRouting configuration in your application's bootstrap/app.php.
In this post, we will only focus on the web routes.

Route definitions
The simplest way to define a route is by using a closure:
Route::get('/about', function () {
    return view('about');
});
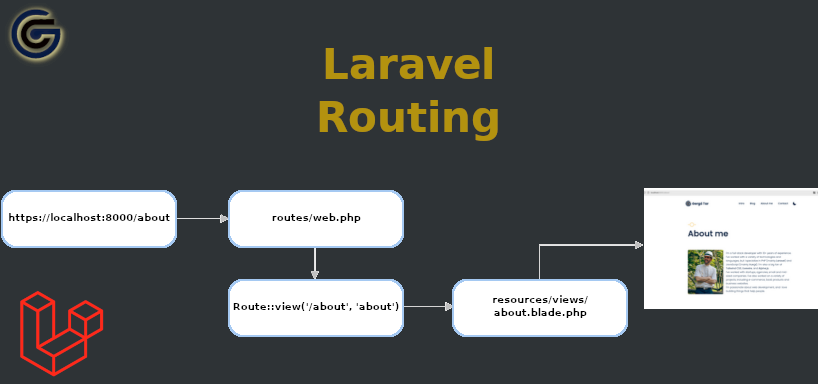
When you visit the /about URL of the application, the router matches the appropriate method in the web.php file. It first matches the line above and then executes the related action, which could be a callback, a view or a controller method. This callback function calls the template file located at resources/views/about.blade.php. And the view method generates the HTML output that the visitor sees in the browser.

View Routes
If you only want to display a static HTML page at your selected URL, you can use a View route like this:
Route::view('/about', 'about');This achieves the same result as the previous version, which uses a closure.
Using Controllers for Route handling
What if you need to perform an action or extract data from a database before displaying your HTML output? Instead of using a closure, it is better to utilize a controller where you can define a specific action for the route.
And now instead of a closure, you can use an array. The first element of the array is the controller class, and the second element is the name of the method within that controller. For example:
Route::get('/posts', [PostController::class, 'index'])->name('posts.index');Here is the simple index method that retrieves post records from the database and passes them to the view.
<?php

namespace App\Http\Controllers;

use App\Models\Post;

class PostController extends Controller
{
    public function index()
    {
        $posts = Post::all();

        return view('post.index', [
            'posts' => $posts,
        ]);
    }
}
And a simple blade template to list the posts:
@foreach ($posts as $post)
    <article class="py-6 border-b border-grey-lighter ">
        <span class="inline-block px-2 py-1 mb-4 text-sm rounded-full bg-green-light font-body text-green">
            {{ $post->category }}
        </span>
        <a href="/posts/{{ $post->slug }}">
            <img src="{{ $post->featured_image }}" alt="{{ $post->title }}"
                class="object-cover w-full h-56 rounded-t-md" />
        </a>
        <a href="/posts/{{ $post->slug }}"
            class="block mt-4 text-lg font-semibold transition-colors font-body text-primary hover:text-green">
            {{ $post->title }}
        </a>
        <p class="text-gray-800">
            <a href="/posts/{{ $post->slug }}">
                {{ $post->excerpt }}
            </a>
        </p>
    </article>
@endforeach
Route parameters
Sometimes, you need to fetch a record from the database using a route parameter. You may define a parameter in your route definition like this:
Route::get('/posts/{id}', [PostController::class, 'show']);In this example, I want to retrieve a post using its ID. In my controller method, I can search for the post model by the given ID:
public function show(int $id)
{
    $post = Post::find($id);

    if (!$post) {
        abort(404);
    }

    return view('post.show', [
        'post' => $post,
    ]);
}
Laravel can automatically inject model instances directly into your routes. Instead of using {id}, you can replace it with the {post} model. This way, Laravel automatically searches for the Post model by ID and retrieves it if it exists.
Route::get('/posts/{post}', [PostController::class, 'show']);And the method can be simplified by passing the Post model as a parameter. I can also skip the extra condition to check if the post exists, since Laravel handles that automatically.
public function show(Post $post)
{
    return view('post.show', [
        'post' => $post,
    ]);
}
However, this approach may not create a user-friendly URL. Instead of writing a URL like /posts/2, I would prefer something like /posts/laravel-routing-basics that uses the post's slug instead of its ID.
You can customize the route to specify that it should search by the slug.
Route::get('/posts/{post:slug}', [PostController::class, 'show']);Now, the URL https://localhost:8000/posts/laravel-routing-basics will load the specified post by its slug.
You can also change the default model binding in your model so all of your links will use the slug instead of the ID.
In my Post model, I added the getRouteKeyName method to achieve this:
/**
 * Get the route key for the model.
 */
public function getRouteKeyName(): string
{
    return 'slug';
}
After this change, there is no longer a need to specify the column name in the route definition, allowing us to revert to the original definition:
Route::get('/posts/{post}', [PostController::class, 'show']);Scope binding
You can include as many route parameters as needed. For example, if you want to fetch a specific User's Post, you can write:
Route::get('/users/{user}/posts/{post}', [UserPostController::class, 'show']);And your controller method parameters should look like this:
public function show(User $user, Post $post)
{
    return view('user.post.show', [
        'post' => $post,
        'user' => $user,
    ]);
}
With this approach, any post can be displayed under any user, even if the post doesn't belong to that user. This is why it is recommended to use scope binding, which ensures that the child model (Post) is linked to the parent model (User), preventing access to unauthorized data. In this case, we want to verify that the selected Post belongs to the User. If it does not, the application should return a 404 page.
First, ensure that your User model has a posts relationship.
public function posts(): \Illuminate\Database\Eloquent\Relations\HasMany
{
    return $this->hasMany(Post::class);
}
In the Post model, establish a relationship with the User as well.
public function user(): \Illuminate\Database\Eloquent\Relations\BelongsTo
{
    return $this->belongsTo(User::class);
}
After this, you can invoke the scopeBindings method in your route definition.
Route::get('/users/{user}/posts/{post}', [UserPostController::class, 'show'])->scopeBindings();Router methods
Of course, in addition to the GET method, you can register routes that respond to any HTTP method.
Route::get($uri, $callback);
Route::post($uri, $callback);
Route::put($uri, $callback);
Route::patch($uri, $callback);
Route::delete($uri, $callback);
Route::options($uri, $callback);
For instance, to update a specific Post model, send a PATCH request to the appropriate route:
Route::patch('/posts/{post}', [PostController::class, 'update']);Resource Route
Another useful route type is the resource route. This allows you to generate multiple route definitions with a single line of code:
Route::resource('posts', PostController::class);This line generates the following route definitions:
Route::get('/posts', [PostController::class, 'index']);
Route::post('/posts', [PostController::class, 'store']);
Route::get('/posts/create', [PostController::class, 'create']);
Route::get('/posts/{post}', [PostController::class, 'show']);
Route::get('/posts/{post}/edit', [PostController::class, 'edit']);
Route::patch('/posts/{post}', [PostController::class, 'update']);
Route::delete('/posts/{post}', [PostController::class, 'destroy']);
If you don’t need all the routes, you can specify which ones to generate by using the only method. For example:
Route::resource('posts', PostController::class)->only(['index', 'show']);The line above will generate only the index and show route definitions.
Alternatively, you can use the except method to list the routes you want to exclude from generation:
Route::resource('posts', PostController::class)->except(['delete']);This will generate all routes except the delete route.
Listing Routes
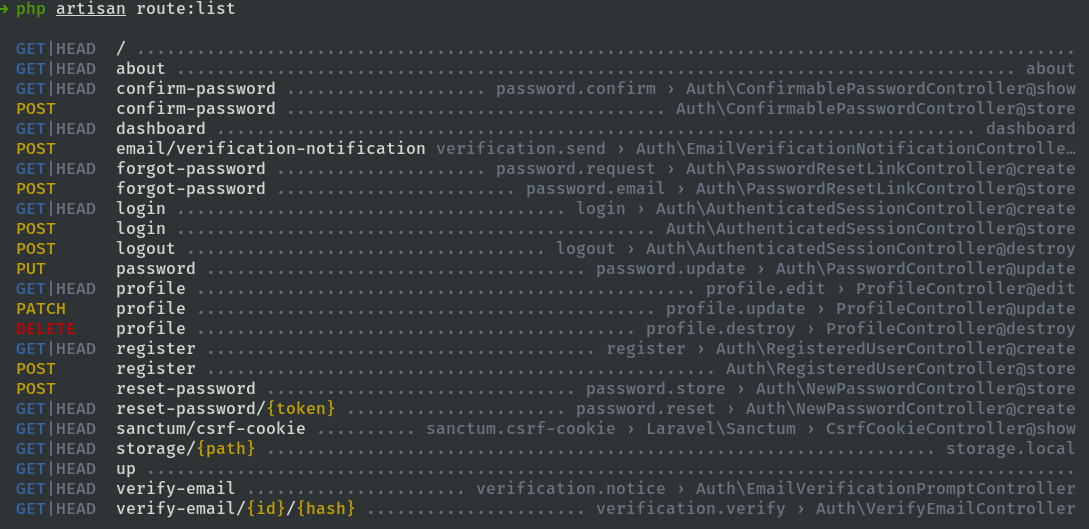
You can list all the routes used by your application in the console by using the following Artisan command:
php artisan route:listIt displays the available URLs, their HTTP methods, route names, and whether they use a controller.

Named routes
Currently, the about URL does not have a name. Assigning a name to your routes is useful because it allows you to generate URLs throughout your code using the route function. To name the route, you can chain the name method onto the route definition:
Route::view('/about', 'about')->name('about');
For instance, if you want to link to the About page in your navigation bar, you can use the route('about') method.
<a href="{{ route('about') }}" class="block px-2 mb-3 text-lg font-medium text-white font-body">
    About
</a>
Additionally, if you decide to change the URL later, as shown here where I've changed it to /about-me:
Route::view('/about-me', 'about')->name('about');You won’t have to update any references in your code, as they will automatically point to the new URL.
Route groups
You can group routes to share the same attributes.
Controller
For example, let's look at the previous examples for the PostController without using a resource route. Instead of listing each route individually, you can modify them in the following way using the controller method:
Route::controller(PostController::class)->group(function () {
    Route::get('/posts/{id}', 'show');
    Route::post('/posts', 'store');
    ....
});
Middleware
Another useful way to group routes is by using middleware. Middleware are helpful for filtering HTTP requests or for performing tasks before or after each request. A common middleware is the auth middleware, which checks if a user is authenticated. This allows us to create a middleware group for routes intended specifically for authenticated users.
Route::middleware('auth')->group(function () {
    Route::put('password', [PasswordController::class, 'update'])->name('password.update');
    Route::post('logout', [AuthenticatedSessionController::class, 'destroy'])->name('logout');
});
It is possible to use multiple middlewares in a group. In the following example, the user dashboard is accessible only to authenticated users who have also verified their emails.
Route::middleware(['auth', 'verified'])->group(function () {
    Route::view('/dashboard', 'dashboard');
});
You can read more about middlewares HERE.
Prefix
Using the prefix method, you can easily add a prefix to a route group. In this example, I am using the blog prefix, which means I don't need to prepend each route definition with /blog/. Instead, I can simply create my routes like this:
Route::prefix('blog')->group(function () {
    Route::get('/', Blog::class)->name('blog'); // -> /blog/
    Route::get('/posts', [PostController::class, 'index'])->name('posts.index'); // -> /blog/posts
    Route::get('/posts/{post}', [PostController::class, 'show'])->name('posts.show'); // -> /blog/posts/:post
});
This way, all routes in this group will automatically have the /blog/ prefix.
Name prefix
We can also use prefixing for route names using the name method. Let's refactor the post routes from the previous example:
Route::prefix('posts')->name('posts.')->group(function () {
    Route::get('/', [PostController::class, 'index'])->name('index');
    Route::get('/{post}', [PostController::class, 'show'])->name('show');
});
Here you have the basics of routing in Laravel. There are many additional methods and options available, such as route redirects, fallback routes, and rate limiting, which I plan to discuss in future blog posts. It's helpful to take a look at the official documentation for more detailed information.
If you want to support my work, you can donate using the button below. Thank you!